Whisk AI Tutorial: Complete Beginner-to-Advanced Guide (2026)
The image generator that ditches text prompts for something way cooler.
1. Introduction to Whisk AI
Let’s be real—writing the perfect AI prompt can feel like trying to describe a dream to someone who’s never met you.
You end up with something like “a mystical forest with bioluminescent mushrooms at twilight, cinematic lighting, trending on ArtStation” when all you wanted was… well, you know what you wanted when you see it.
Enter Whisk AI, Google Labs‘ experimental image generator that’s turning heads in 2026. Instead of wrestling with text prompts, Whisk lets you show the AI what you want. Got a photo of your dog? A sketch of a character? A screenshot of a vibe you’re chasing? Just drop it in.

Why Everyone’s Talking About Whisk AI Right Now
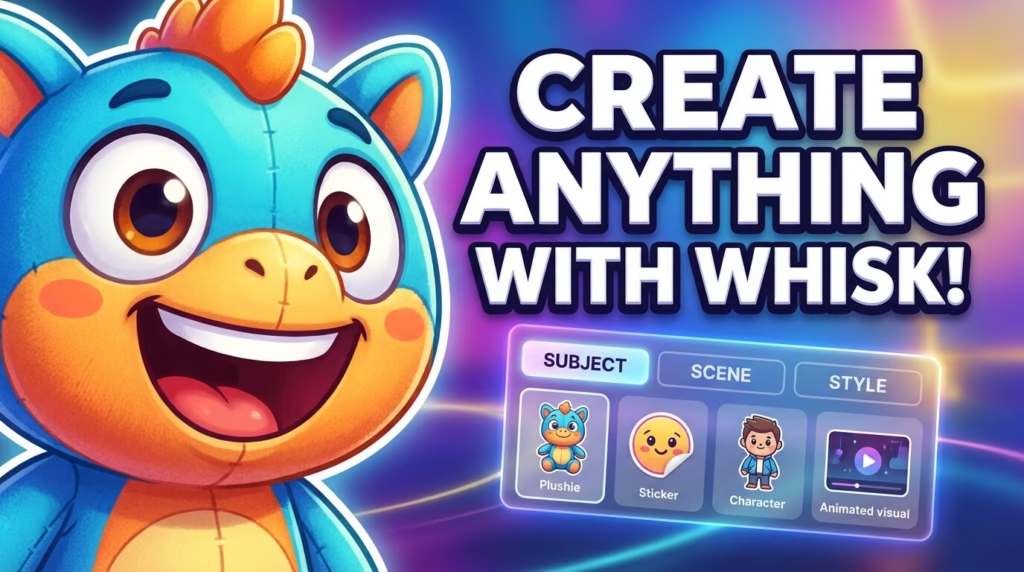
Here’s what makes Whisk different: it uses three visual reference points instead of traditional text prompts:
- Subject: What or who is in your image (your character, product, pet, logo)
- Scene: Where it’s happening (beach, city, space, your bedroom)
- Style: How it should look (plushie, anime, clay animation, vintage photo)
This approach is a game-changer for creators who’ve been frustrated with text-based AI tools. You’re no longer translating your vision into words—you’re showing the AI exactly what you mean.
Who’s Actually Using This?
Right now, Whisk AI is exploding in these communities:
- Merch sellers turning character concepts into plushie designs
- Sticker artists creating print-ready designs in minutes
- Content creators making consistent YouTube thumbnails
- Animators generating style frames for video projects
- Brand designers visualizing product concepts
If you’ve ever thought “I wish I could just show the AI what I want,” this tutorial is for you—whether you’re a complete beginner or a seasoned designer looking to streamline your workflow.
2. How to Access Whisk AI (Free Access & Availability)
Good news: Whisk AI is completely free right now. The “experimental” label means Google is testing it with the public before (potentially) rolling it into a paid product. Translation? Get in while it’s free.
Step-by-Step: Getting Started
- Head to Google Labs (labs.google.com/fx or search “Google Labs experiments”)
- Sign in with your Google account (any Gmail will work)
- Look for “Whisk” in the experiments list
- Enable it with one click—no waitlist, no credit card
That’s it. You’re in.
The Fine Print
Country Availability: Whisk AI is available in most countries, but Google has restricted access in some regions due to experimental status. If you’re seeing a “not available in your region” message, you might need to try a VPN or wait for wider rollout.
Browser Support: Chrome works best (obviously—it’s Google). Firefox and Safari work too, but you might hit occasional glitches. Edge is fine. Internet Explorer? Come on, it’s 2026.
What “Experimental” Really Means: Your generations might suddenly stop working. Features might change overnight. Google could shut it down tomorrow (they probably won’t, but it’s Google). Back up any images you love.
Common Access Issues
Problem: “This experiment isn’t available yet”
Fix: Check if you’re signed into the correct Google account. Labs experiments are tied to specific accounts.
Problem: Infinite loading screen
Fix: Clear your browser cache, try incognito mode, or switch browsers.
Problem: “Daily limit reached” immediately
Fix: You might be in a shared network (school, office) where others burned through the quota. Try a different connection.
3. Whisk AI Interface Explained
The Whisk interface is refreshingly simple—three boxes, three choices, infinite possibilities.
3.1 Subject
This is who or what your image is about. Your subject is the identity anchor—it’s what Whisk tries to keep consistent across generations.
What works as a subject:
- Photos of people (your face, a friend, a celebrity)
- Drawings or sketches of characters
- Product photos (your mug, a toy, a logo)
- Animals (your cat is about to become a plushie)
- Even abstract shapes if you’re feeling experimental
Pro tip: The clearer and more centered your subject, the better. A blurry selfie with half your face cut off? Whisk will struggle. A well-lit portrait with a clean background? Money.
How subject references work: Whisk doesn’t just copy your image—it extracts the essence. It identifies key features (face structure, color palette, overall shape) and rebuilds them in the new style. Think of it like an AI sketch artist who’s really, really good at their job.
3.2 Scene (Where the Magic Happens)
The scene is your environment and composition. This determines the mood, setting, lighting, and camera angle of your final image.
Scene examples that work great:
- “Forest at sunset with fireflies” (nature vibes)
- “Cyberpunk city street at night” (neon everything)
- “Cozy coffee shop interior” (warm and inviting)
- “Floating in outer space” (cosmic drama)
- “Professional studio portrait” (clean and commercial)
What scene controls:
- Background details and complexity
- Lighting direction and quality
- Camera angle (close-up, wide shot, bird’s eye)
- Atmosphere and mood
- Props and environmental storytelling
You can upload a scene reference image OR type a description. Honestly? Uploading a vibe photo from Pinterest usually works better than describing it.
3.3 Style (The Aesthetic Transform)
This is where Whisk gets fun. Style is the artistic filter that completely transforms your output—it’s the difference between a photo and a clay sculpture of the same thing.
Popular styles that creators love:
For Merch:
- Plushie/stuffed toy aesthetic
- Flat sticker design (bold outlines, limited colors)
- Kawaii/cute chibi style
- Vinyl toy collectible look
For Content:
- Pixar 3D animation style
- Studio Ghibli watercolor
- Retro 80s poster art
- Clay animation (like Wallace & Gromit)
- Neon cyberpunk
- Minimalist geometric art
For Realistic:
- Professional photography
- Oil painting
- Pencil sketch
- Magazine editorial style
The override effect: Style is POWERFUL. It will completely override the realism of your subject and scene. Want your actual face as a plushie? Style: plushie. Done. Your realistic photo becomes a soft, cuddly version of you that honestly might be cuter than the original.
4. Step-by-Step Whisk AI Tutorial (First Image)
Alright, let’s actually make something. I’m going to walk you through your first Whisk generation like we’re sitting together at your desk.
Your First Generation: A Character Plushie
Step 1: Choose Your Subject
Let’s say you want to turn your profile picture into a plushie design.
- Click “Upload” in the Subject box
- Select a clear photo of yourself (or whatever you want to plushify)
- Wait for it to process (usually 2-3 seconds)
Step 2: Set Your Scene
For a plushie, you want simple and clean:
- In the Scene box, type: “white studio background, product photography”
- OR upload a photo of a clean, minimal background
- Keep it simple—busy backgrounds fight with the plushie aesthetic
Step 3: Apply Your Style
Here’s where it gets good:
- In the Style box, type: “soft plushie toy, cute stuffed animal style”
- OR upload a photo of a plushie you like the style of
- Be specific: “round kawaii plushie” vs “realistic teddy bear” gives very different results
Step 4: Generate
Hit that big “Create” button and wait. First-time generations take 10-30 seconds. Whisk is doing some serious computational heavy lifting right now.
Step 5: Review Your Results
You’ll get one image. Look at it. Really look at it.
- Does it capture your subject’s essence?
- Is the style what you wanted?
- Is anything weirdly distorted? (AI hands strike again?)
Why It Looks Different Every Time
This trips people up. You can use the EXACT same inputs and get different outputs. Why? Because Whisk uses AI reasoning, not template swapping. It’s interpreting your references creatively each time, like asking five artists to draw the same thing—you’ll get five unique interpretations.
This isn’t a bug. It’s a feature. It gives you variety.
Beginner Mistakes to Avoid
Mistake: Overcomplicating your first try with three complex reference images
Fix: Start simple. One subject, one style, typed scene description.
Mistake: Expecting pixel-perfect accuracy
Fix: Whisk is creative, not precise. Embrace the variation.
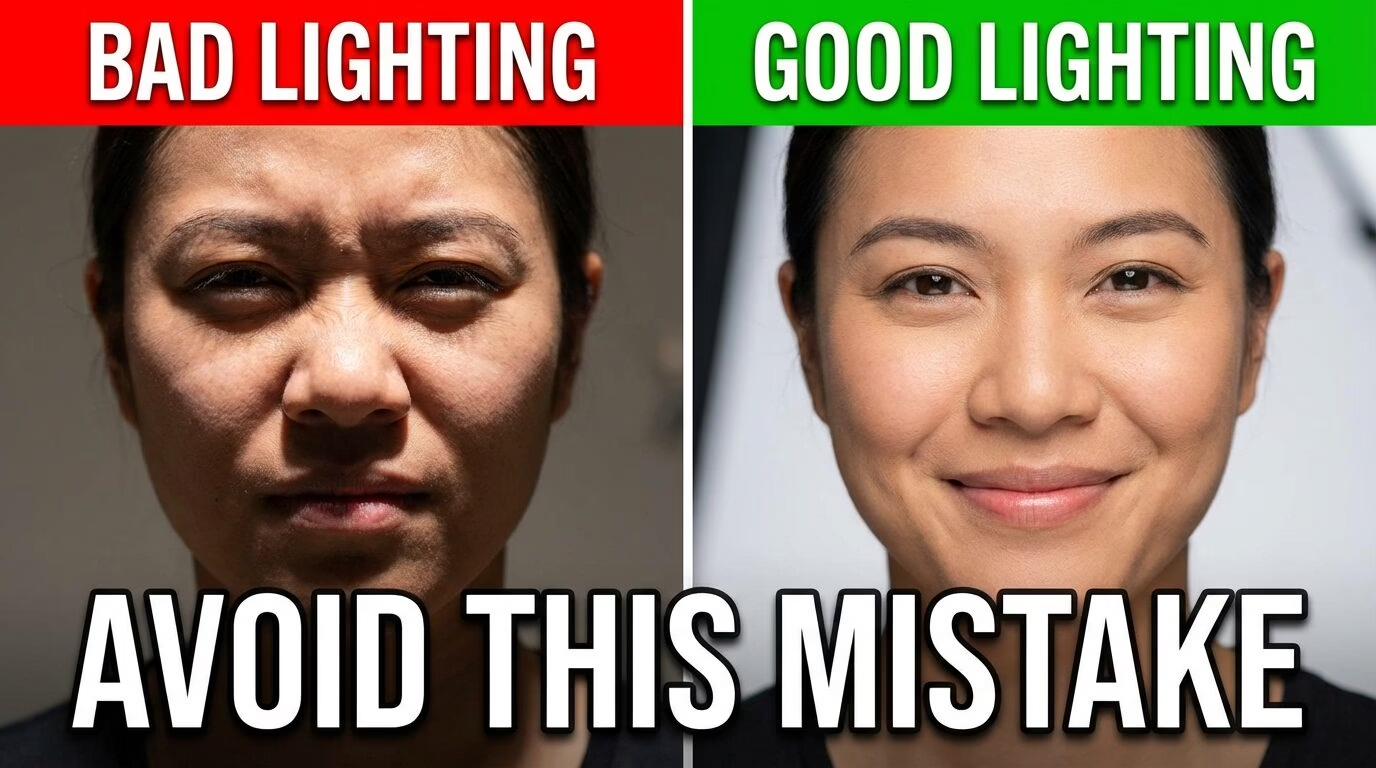
Mistake: Using low-resolution or dark images as references
Fix: Quality in = quality out. Use clear, well-lit references.
5. Using Your Own Photos in Whisk AI
Let’s talk about the elephant in the room: uploading photos of yourself (or others).
What Types of Photos Work Best
Great photos for Whisk:
- Clear, well-lit portraits
- Simple backgrounds (solid colors, minimal clutter)
- Centered subject with space around edges
- Medium to high resolution (at least 512px wide)
- Direct gaze at camera (for face consistency)
Photos that’ll give you headaches:
- Group photos (Whisk gets confused about which person to focus on)
- Heavy filters or edits (confuses the AI’s feature detection)
- Extreme angles or partial faces
- Motion blur or low light
- Sunglasses or masks (hides key facial features)
Face Consistency vs Object Consistency
Here’s something interesting: Whisk AI is WAY better at maintaining face structure than, say, keeping your tattoos accurate or your specific shirt pattern.
What stays consistent:
- Overall face shape
- Eye color and shape
- Hair color and general style
- Skin tone
- Approximate age
What gets creative:
- Specific hairstyles (gets interpreted artistically)
- Clothing details (unless style reference is super specific)
- Accessories
- Fine details like freckles or small scars
Do’s and Don’ts for Personal Images
DO:
- Use recent, clear photos of yourself
- Experiment with different styles (you as anime character, clay figure, vintage photo)
- Have fun with it—this is creative play
DON’T:
- Upload photos of other people without permission (seriously, don’t)
- Use Whisk to create deepfakes or misleading images
- Generate images for impersonation or fraud
- Upload photos of minors in suggestive styles
Privacy Considerations
Be smart about this. When you upload a photo to Whisk:
- It’s being processed by Google’s AI systems
- Google might use generations to improve the tool (check their terms)
- Downloaded images are yours, but originals you upload are in their system
- Don’t upload sensitive photos you wouldn’t want potentially seen
Rule of thumb: If you wouldn’t post it publicly on social media, don’t upload it to an experimental AI tool.
6. Generating Consistent Characters in Whisk AI
This is the Holy Grail for content creators: a character that looks like the SAME character across multiple images.
Why Consistency Is Hard in AI Image Tools
Traditional text-based AI generators struggle with character consistency because they’re creating from scratch each time. Even with detailed prompts, you get variations—different face shapes, changing eye colors, shifted proportions.
Whisk helps because you’re using the SAME subject reference each time. But it’s not foolproof.
Best Practices for Repeatable Characters
1. Create a Master Reference Image
Generate one really good character image, download it, and use THAT as your subject reference going forward. This locks in the visual identity better than constantly switching source images.
2. Keep Your Subject Reference Consistent
Don’t upload different photos of “the same” character. Pick ONE and stick with it. The AI doesn’t know that five different drawings are meant to be the same person—it just sees five different subjects.
3. Style Consistency Matters Too
If you want consistent characters, use the same style reference (or description) every time. Switching from “3D Pixar style” to “2D anime style” will give you different-looking characters even with the same subject.
4. Simple Clothing and Features Work Better
Complex outfits, intricate hairstyles, and detailed accessories get reinterpreted differently each generation. Simple = more consistent.
Multi-Image Character Workflow
Here’s how pros do it:
Step 1: Generate your base character (Subject: your sketch, Scene: simple background, Style: your chosen aesthetic)
Step 2: Download the BEST result
Step 3: Use that downloaded image as your subject reference for ALL future generations
Step 4: Change only the scene and keep style consistent for variations
Example workflow:
- Generation 1: Character standing, white background → Save best result
- Generation 2: Same character (using Gen 1 as subject), Scene: “sitting in cafe”
- Generation 3: Same character reference, Scene: “walking in park”
- Generation 4: Same character reference, Scene: “close-up portrait”
Tips for Expressions, Poses, and Lighting
Expressions: These are HARD to control precisely. Whisk will interpret the general mood of your scene description. “Happy scene” = happy face. “Dramatic scene” = more serious expression.
Poses: You have limited control. The scene description influences this (sitting, standing, action), but you can’t choreograph exact poses like in other tools.
Lighting: The scene controls this. Want consistent lighting? Use the same scene reference or very similar descriptions.
Real Talk: It’s Not Perfect
Even with these techniques, you’ll get variation. That’s the nature of generative AI right now. If you need pixel-perfect consistency across hundreds of images, you might need to combine Whisk with traditional editing tools or use more controlled AI systems.
But for 80% of use cases? This workflow gets you close enough that your audience will recognize the same character.
7. Creating Multi-Character Scenes
Want two characters in the same image? Three? A whole group? It’s possible with Whisk, but it requires some strategy.
The Challenge
Whisk’s subject box is designed for ONE primary subject. When you try to add multiple characters, the AI has to split its attention, and things can get… weird.
Method 1: Composite Subject Reference
Create a single image with multiple characters already in it, then use that as your subject.
Steps:
- Use a traditional editor (Photoshop, Canva, even Paint) to arrange multiple character images into one frame
- Upload this composite as your subject
- Let Whisk interpret the whole scene
Pros: You control positioning
Cons: Less flexibility for character arrangement in output
Method 2: Scene-Heavy Approach
Focus on the scene description to create the multi-character context.
Example:
- Subject: Main character
- Scene: “two people talking in a park, wide shot”
- Style: Your chosen aesthetic
Whisk will create a second character based on the scene context, but you won’t control what they look like.
Pros: Natural scene composition
Cons: No control over secondary characters
Method 3: Sequential Approach (Advanced)
Generate characters separately, then combine using traditional editing:
- Generate Character A with Whisk (save)
- Generate Character B with Whisk (save)
- Use editing software to composite them into one scene
- Optional: Use that composite as a subject reference for style-unified regeneration
Pros: Full control over each character
Cons: Requires editing skills and extra software
Managing Scale, Positioning, and Interaction
Scale issues: Whisk sometimes makes characters wildly different sizes. In your scene description, specify relative size: “two characters of similar height” or “child character next to adult character.”
Positioning: Whisk interprets positioning from your scene description or reference. “Standing side by side,” “facing each other,” “background and foreground” all work as scene descriptors.
Interaction: The more specific your scene description about how characters interact, the better. “Two characters high-fiving” is better than “two characters together.”
Avoiding Common Multi-Character Disasters
Distorted faces: More characters = less attention per face. Keep scenes simple and use higher-quality subject references.
Mismatched styles: If combining characters from different generations, they might have slightly different stylistic treatments. Regenerate with both in a composite subject to unify style.
Floating body parts: The AI sometimes… creates art. Weird art. If characters are interacting physically, be prepared for anatomical creativity. Check those hands.
Story-Based Scene Building
Instead of fighting Whisk’s limitations, work with them. Create sequential single-character scenes that tell a story:
- Panel 1: Character A looking at something (off-screen)
- Panel 2: Character B holding that thing
- Panel 3: Both characters (composite) celebrating
This comic-style approach works better than trying to force complex multi-character interactions in a single generation.
8. Advanced Prompt & Refinement Techniques
Ready to level up? Let’s talk about how Whisk actually interprets your inputs and how to refine outputs like a pro.
How Whisk Interprets Minimal vs Detailed Prompts
Minimal prompt:
- Subject: [photo]
- Scene: “outdoors”
- Style: “cartoon”
Result: Generic, broad interpretation. The AI fills in ALL the details.
Detailed prompt:
- Subject: [photo]
- Scene: “golden hour beach, gentle waves, soft sand, warm lighting, peaceful mood, wide cinematic shot”
- Style: “Pixar 3D animation, vibrant colors, soft shadows, high quality render”
Result: More controlled output that matches your specific vision.
The sweet spot: Detailed enough to guide the AI, but not so specific that you’re fighting against its creative interpretation. Think “art direction” not “pixel-perfect instructions.”
Refining Outputs Without Restarting
Here’s a workflow that saves time and generations:
First Generation: Start broad. Basic subject, simple scene, clear style.
Evaluate: What worked? What didn’t?
Second Generation:
- Keep what worked (same subject reference if character is good)
- Adjust what didn’t (tweak scene description, modify style reference)
Third Generation: Fine-tune. Make smaller adjustments based on previous results.
Example progression:
- Try 1: “Cartoon plushie” → Too generic
- Try 2: “Soft round plushie toy, kawaii style” → Better but too flat
- Try 3: “Soft round plushie toy with subtle shading, kawaii style, studio lighting” → Perfect
Style Stacking and Visual Iteration
You can combine style concepts to get unique aesthetics:
- “Plushie toy + vintage 90s aesthetic”
- “Anime style + clay animation texture”
- “Watercolor painting + geometric shapes”
- “Neon cyberpunk + soft pastel colors”
The AI will attempt to merge these concepts. Results vary from “wow, that’s genius” to “that’s… interesting?” Experimentation is key.
Advanced Scene Control
Lighting direction:
- “Backlit” (silhouette effects)
- “Side lighting” (dramatic shadows)
- “Soft diffused lighting” (commercial/clean look)
- “Golden hour” (warm, romantic)
- “Neon lighting” (colorful, dramatic)
Camera angles:
- “Bird’s eye view” (looking down)
- “Worm’s eye view” (looking up)
- “Dutch angle” (tilted/dynamic)
- “Close-up portrait” (face focus)
- “Wide environmental shot” (context and setting)
Composition rules:
- “Centered composition” (balanced, stable)
- “Rule of thirds” (dynamic, professional)
- “Leading lines” (directional flow)
- “Negative space” (minimal, clean)
Common Prompt Mistakes to Avoid
Mistake 1: Contradicting descriptions
“Realistic photo + cartoon style” confuses the AI. Pick one direction.
Mistake 2: Over-specifying exact details
“Blue shirt with 3 buttons and white collar” → AI might give you 4 buttons. Don’t micromanage.
Mistake 3: Using too many style references
One clear style works better than “anime + oil painting + photograph + sketch”
Mistake 4: Forgetting subject is your anchor
If you keep changing subjects, consistency is impossible. Lock your subject first.
Mistake 5: Not describing mood
“Happy,” “mysterious,” “energetic,” “peaceful” → these mood words significantly influence the final image.
The Iterate-And-Save Method
Pro workflow:
- Generate → Save promising results (even if not perfect)
- Use saved results as references for next round
- Mix and match: Try Subject from Gen 3, Scene from Gen 7, Style from Gen 2
- Build a library of working references
- Create variations by changing only one element at a time
This gives you way more control than starting from scratch every time.
9. Best Prompts for Plushies, Stickers & Merch
Let’s get practical. You want to sell stuff. Here’s how to make Whisk work for your merch business.
Plushie-Style Prompt Examples
Basic plushie:
- Subject: [your character/logo/pet]
- Scene: “white studio background, professional product photo”
- Style: “soft plushie toy, cute stuffed animal, round kawaii design”
Premium plushie:
- Subject: [reference]
- Scene: “studio lighting, soft shadows, product photography, clean white background”
- Style: “high quality plushie, detailed stitching visible, soft fabric texture, collectible toy”
Chibi plushie:
- Subject: [reference]
- Scene: “simple background, centered”
- Style: “chibi plushie style, oversized head, tiny body, kawaii cute, round soft shapes”
Animal plushie:
- Subject: [pet photo]
- Scene: “sitting position, white background”
- Style: “realistic plushie, detailed fur texture, glass eyes, soft toy aesthetic”
Sticker-Ready Design Prompts
Vinyl sticker style:
- Subject: [your design]
- Scene: “flat white background, no shadows”
- Style: “bold outline sticker design, flat colors, vector art style, die-cut ready”
Kawaii sticker:
- Subject: [character]
- Scene: “simple background”
- Style: “cute kawaii sticker, bold black outline, pastel colors, simplified shapes, glossy sticker finish”
Die-cut character sticker:
- Subject: [character]
- Scene: “transparent background effect, no background”
- Style: “die-cut sticker design, thick outline, vibrant colors, matte finish look”
Holographic sticker vibe:
- Subject: [reference]
- Scene: “gradient background or white”
- Style: “holographic sticker, iridescent rainbow effect, shiny surface, bold outlines”
Tips for Transparent Backgrounds
Whisk doesn’t output true transparent PNGs (yet), but you can get close:
- Use scene description: “pure white background, no shadows”
- Generate your sticker
- Download the image
- Use free tools (Remove.bg, Photopea, Canva) to remove the white background
- Export as PNG with transparency
Most print-on-demand services can handle this simple background removal too.
Merch-Friendly Resolutions and Compositions
Resolution reality check: Whisk outputs are decent quality but not massive. Expect around 1024×1024 to 1536×1536 pixels depending on the generation.
What this means for merch:
- Good for: Stickers, phone cases, small prints, t-shirt graphics
- Okay for: Hoodies, tote bags (test first)
- Not great for: Large posters, canvas prints, detailed all-over prints
Composition tips:
- Center your subject (easier to position on merch)
- Leave padding around edges (print safety zones)
- Avoid intricate small details (they’ll blur on fabric)
- Test on mockups before ordering samples
Preparing Whisk Outputs for Print
Basic workflow:
- Generate your design in Whisk
- Download the best result
- Enhance resolution with AI upscaling (Topaz, Real-ESRGAN, or even Photoshop AI)
- Clean up any artifacts or weird details (Photoshop, GIMP, Affinity Photo)
- Test on mockup templates (Placeit, Smartmockups, Printful mockups)
- Order samples before launching (ALWAYS do this)
Color profile warning: Whisk generates RGB images. Most print services prefer CMYK. Convert your files before sending to print to avoid color surprises.
File format cheat sheet:
- Stickers: PNG with transparency
- T-shirts: PNG with transparent background (for direct-to-garment) or vector if possible
- Mugs/hard goods: High-res PNG or JPEG
- Canvas prints: Upscale to at least 300 DPI at intended size
Prompt Formulas That Work
The Formula: Subject: [Your brand character/logo] +
Scene: [Appropriate for product type] +
Style: [Specific merch aesthetic]
Examples:
Coffee Mug Plushie:
“Cute coffee mug character, kawaii face, sitting position, white background” + “Soft plushie toy, round shapes, pastel colors”
Pet Portrait Sticker Pack:
Multiple generations with same pet subject + “Different expressions, simple background” + “Bold sticker style, vibrant colors, thick outlines”
Mascot Merch Line:
Same character subject + “Various activities: skateboarding, gaming, studying, celebrating” + “Consistent cartoon style, bold lines, merch-ready”
10. Animating Whisk AI Images
Still images are cool. Moving images? Even cooler. Let’s talk about turning your Whisk creations into animations.
How Image-to-Video Works with Whisk AI
Whisk AI itself doesn’t create videos—but its outputs are PERFECT starting points for Google’s video AI, Veo 2.
The workflow:
- Generate your perfect frame in Whisk
- Download the image
- Upload to Veo 2 (or other image-to-video tools)
- Add motion prompts
- Generate your animation
Why Whisk images work well for animation: The stylized, clean aesthetics of Whisk outputs (especially plushie, sticker, and cartoon styles) animate more consistently than complex realistic images.
Using Veo-Based Animation Workflows
As of 2026, Veo 2 is available through Google Labs (same place you found Whisk).
Basic Veo animation:
- Upload your Whisk-generated image
- Prompt: “gentle breathing animation, slight movement”
- Generate (takes 2-4 minutes)
- Download MP4
Common motion types:
Subtle motion (for social media):
- “Gentle wind blowing hair”
- “Breathing animation”
- “Blinking eyes”
- “Slight rotation, 360 degree view”
Cinematic motion (for content):
- “Camera slowly zooms in”
- “Camera pans left to right”
- “Character walks toward camera”
- “Background moves, character stays still” (parallax effect)
Cartoon motion (for animated content):
- “Bouncing up and down energetically”
- “Dancing side to side”
- “Waving at camera”
- “Jumping with joy”
Best Whisk Styles for Animation
Great for animation:
- Plushie style (simple shapes animate smoothly)
- Cartoon/anime (designed for motion)
- Clay animation style (inherently animation-ready)
- Flat sticker designs (clean motion)
Challenging for animation:
- Highly detailed realistic images (AI struggles with complex physics)
- Intricate textures (can become distorted in motion)
- Images with lots of small details (motion blur issues)
Video Length Limits & Quality Expectations
Current Veo 2 limits (as of early 2026):
- Video length: 2-8 seconds typical
- Resolution: 720p to 1080p
- Generation time: 2-5 minutes per video
- Daily limit: Usually around 10-15 videos per day
Quality reality check: These are SHORT animations. Think:
- Instagram story loops
- YouTube shorts intros
- TikTok profile videos
- Website hero section animations
- Product showcase videos
Not: Full animated short films. (Yet. Give it another year.)
Creative Animation Ideas with Whisk
1. Character showcase reels: Generate 5-6 poses of your character in Whisk, animate each with subtle motion, edit into a reel.
2. Product reveals: Plushie design slowly rotating 360° with soft lighting changes.
3. Sticker come-to-life: Start with flat sticker style in Whisk, animate with Veo adding dimension and movement.
4. Thumbnail animations: Create static YouTube thumbnail in Whisk, animate for social media promo (attention-grabbing).
5. Mascot personality videos: Series of Whisk-generated expressions, each animated with appropriate emotions (happy bounces, sad sighs, excited jumps).
Combining Multiple Tools
Power workflow:
- Whisk: Generate character style frames
- Veo: Add subtle motion to each frame
- Video editor (CapCut, Premiere, Final Cut): Combine animations with transitions
- ElevenLabs or similar: Add voice if needed
- Sound design: Music and effects
This combination lets you create surprisingly polished animated content that looks way more expensive than it is.
Budget: Free for Whisk, free for Veo (while in Labs), free tier options for editing and audio. Total cost: potentially $0.
11. Daily Limits, Restrictions & Best Practices

Let’s talk about the annoying but necessary reality: limits.
Daily Generation Limits Explained
Whisk AI is free, but not unlimited. Here’s what you’re working with:
Typical daily limits (subject to change):
- Image generations: 25-50 per day (varies by account and server load)
- No monthly rollover (unused generations don’t accumulate)
- Resets at midnight Pacific Time (Google is California-based)
Why limits exist: Computational cost. Every Whisk generation costs Google money in GPU time. Free access means reasonable limits.
What Resets and When
Daily reset:
- Counter resets at 12:00 AM Pacific Time
- Your generation count goes back to zero
- Ready to create again
Important: The reset is time-zone specific. If you’re in New York, your resets at 3 AM. In London? 8 AM. In Tokyo? 5 PM. Plan accordingly.
How to Avoid Wasted Generations
Before you generate, ask:
- Are my references clear? Blurry = wasted generation
- Is my prompt specific enough? Vague = unpredictable results
- Have I learned from previous attempts? Don’t repeat the same mistake
- Am I experimenting efficiently? Test one variable at a time
Strategies to maximize your daily limit:
Morning strategy: Use first batch for important projects (fresh mind, full quota)
Evening strategy: Use remaining generations for experimentation (less pressure, learning time)
Batch strategy: Generate similar items together (stickers pack, character variations) while your vision is focused
Save everything strategy: Even “bad” results might be useful later. Download them all.
Best Times and Workflows for Heavy Users
Peak vs off-peak:
- Peak times (10 AM – 8 PM Pacific): Slower generation, potential service interruptions
- Off-peak (late night, early morning): Faster generation, fewer errors
If you’re a power user (merch seller, content creator doing volume):
Strategy 1: Create a generation schedule
- Monday: Sticker pack (15 generations)
- Tuesday: Plushie variations (15 generations)
- Wednesday: Character poses (20 generations)
- Thursday: Scene variations (15 generations)
- Friday: Experimentation (remaining quota)
Strategy 2: Multiple Google accounts (technically against ToS, but let’s be real)
- Main account: Primary work
- Secondary account: Experiments and tests
- Risk: Both accounts could be flagged
Strategy 3: Plan your references in advance
- Don’t waste generations figuring out what you want to make
- Prepare all subject, scene, and style references before opening Whisk
- Generate with purpose
Working Around Limits (Ethically)
Combine with other tools:
- Use Whisk for initial concepts (10 generations)
- Edit and refine in Photoshop/GIMP (unlimited)
- Create variations with traditional tools (free)
- Come back to Whisk for new directions
Build a reference library:
- Download every decent generation
- Use these as references in future sessions
- One great generation can spawn 20 edited variations
Optimize for quality over quantity:
- 5 thoughtful generations > 25 random attempts
- Learn what works, repeat those patterns
What Happens When You Hit the Limit
You’ll see: “Daily limit reached. Try again tomorrow.”
Your options:
- Wait until reset (patience is a virtue)
- Work on editing existing generations (productive waiting)
- Plan tomorrow’s generations (strategic use of downtime)
- Explore Whisk alternatives temporarily (MidJourney, DALL-E for comparison)
Note: Refreshing the page won’t reset your limit. Google knows. It always knows.
12. Downloading Images & Videos
You made something cool. Now let’s get it off Google’s servers and onto your hard drive.
How to Download Whisk AI Outputs
The obvious way:
- Generate your image
- Click the download button (arrow icon)
- Image saves to your Downloads folder
The right-click way (if download button acts weird):
- Right-click the generated image
- “Save image as…”
- Choose location and filename
The screenshot way (last resort for glitches):
- Screenshot your result
- Crop in any editor
- Not ideal (lower quality) but works in emergencies
Supported Formats and Resolutions
What you actually get:
- Format: JPG or PNG (usually JPG)
- Resolution: Approximately 1024×1024 to 1536×1536 pixels
- Color space: RGB
- File size: 200KB – 2MB typically
What this means:
- Good for web use (social media, websites)
- Okay for small prints
- Need upscaling for large formats
File Naming and Organization
Don’t do this: image(1).jpg, image(2).jpg, image(3).jpg…
You’ll hate yourself in a week.
Do this instead:
Organize by project:
Whisk_Projects/
  ├── Plushie_Designs/
  │   ├── Character_Red_v1.jpg
  │   ├── Character_Red_v2.jpg
  │   ├── Character_Blue_v1.jpg
  ├── Sticker_Pack_1/
  │   ├── Happy_Expression.jpg
  │   ├── Sad_Expression.jpg
  ├── Thumbnails_Feb2026/
Naming convention that works: ProjectName_Description_Version_Date.jpg
Examples:
Mascot_Sitting_v3_2026-02-14.jpgSticker_Cat_Kawaii_Final_0214.jpgThumbnail_Gaming_Red_v1.jpg
Why this matters: You’ll generate dozens (hundreds?) of images. Future-you will thank present-you for clear organization.
Batch Download Strategies
Whisk doesn’t have a “download all” button (frustrating, I know).
Workarounds:
Browser extension method: Use download manager extensions (Image Downloader, Download All Images) on the Whisk page. Right-click → “Download all images.”
Manual but smart: Download as you go. Don’t wait until the end of a session to download 30 images. Do it after each generation.
Cloud backup: Upload favorites to Google Drive, Dropbox, or creative cloud as you work. Automatic backup = peace of mind.
Using Outputs for Different Platforms
Social Media:
- Instagram: Square crops well (Whisk outputs are already square-ish)
- Twitter/X: Works as-is
- TikTok/Shorts: Needs vertical crop (use editing tool)
- Pinterest: Vertical format works better (crop in Canva)
YouTube:
- Thumbnails: 1280×720 minimum (upscale Whisk output)
- Profile pic: Works perfectly (circular crop)
- Banner: Needs panoramic edit (use as element, not full banner)
Print (POD services):
- Redbubble/Teespring: Okay for most products
- Printful: Upscale first for best quality
- Local printer: Definitely upscale, test samples
Professional use (client work, commercial):
- Always upscale with AI tools
- Clean up artifacts in editing software
- Get client approval on sample prints
- Keep raw Whisk outputs as backup
Copyright and Usage Rights
The legal stuff (simplified):
When you generate with Whisk:
- You have rights to use your generations commercially
- Google retains some rights for service improvement
- Don’t claim you drew it yourself (be transparent it’s AI)
- Check if your use case requires additional disclosure (varies by platform/country)
If using photos of people:
- You need permission to upload someone’s photo
- You need permission to commercially use their likeness
- Your own face? You’re good.
- Celebrity faces? Risky territory. (Probably don’t sell merch of AI-generated celebrity plushies.)
13. Whisk AI vs Other AI Image Tools
The burning question: Should you ditch everything else for Whisk?
Short answer: No. But Whisk has a specific superpowers.
Where Whisk AI Excels
1. Visual reference workflow
- Whisk: Show what you want, get it
- Others: Describe what you want, hope for the best
Winner: Whisk (by a mile for non-writers)
2. Character consistency
- Whisk: Good with same subject reference
- DALL-E 3: Struggles with consistency
- Midjourney: Better with style consistency than character
- Stable Diffusion: Needs LoRA training for consistency
Winner: Whisk for ease, SD for ultimate control (with effort)
3. Specific aesthetics (plushie, sticker, toy styles)
- Whisk: Nails these styles naturally
- Others: Needs detailed prompting
Winner: Whisk
4. Beginner friendliness
- Whisk: Upload image, done
- Midjourney: Learn Discord, prompts, parameters
- Stable Diffusion: Install software, learn settings, troubleshoot
Winner: Whisk (not even close)
Where It Falls Short
1. Resolution and detail
- Whisk: ~1024-1536px
- Midjourney: Up to 2048px, more detail
- DALL-E 3: High resolution via ChatGPT Plus
Winner: Midjourney/DALL-E
2. Precise control
- Whisk: Creative interpretation (you suggest, AI decides)
- Stable Diffusion: Granular control over everything
- Midjourney: Strong stylistic control via parameters
Winner: Stable Diffusion
3. Text in images
- Whisk: Not its strength
- DALL-E 3/Ideogram: Much better with text
Winner: DALL-E 3 and Ideogram
4. Photorealism
- Whisk: Stylized interpretations
- Midjourney: Excellent photorealism
- Stable Diffusion: Can achieve photorealism with right models
Winner: Midjourney
Comparison with Popular Alternatives
Whisk AI vs Midjourney
Whisk wins: Easier to use, better at specific styles (plushie, sticker), free
Midjourney wins: Higher quality, more control, better photorealism
Best for: Whisk = quick styled concepts; MJ = polished finals
Whisk AI vs DALL-E 3
Whisk wins: Visual reference workflow, better style consistency
DALL-E wins: Text accuracy, higher resolution, ChatGPT integration
Best for: Whisk = stylized characters; DALL-E = realistic scenes with text
Whisk AI vs Stable Diffusion
Whisk wins: Zero learning curve, cloud-based, no installation
SD wins: Complete control, unlimited generations, customizable everything
Best for: Whisk = quick projects; SD = serious production work
Whisk AI vs Leonardo AI
Whisk wins: Simpler interface, visual reference system
Leonardo wins: More features, better model selection, canvas editor
Best for: Whisk = fast concept generation; Leonardo = full production pipeline
When to Combine Tools Instead of Choosing
Smart workflow examples:
Concept → Production:
- Whisk: Generate 10 character concepts (fast, visual-based)
- Choose best concept
- Midjourney: Create high-res polished version
- Photoshop: Final refinements
Style exploration:
- Whisk: Test different styles quickly (plushie, sticker, 3D, 2D)
- Identify winning style
- Stable Diffusion: Generate variations in winning style with more control
Character design pipeline:
- Whisk: Establish character look and aesthetic
- DALL-E: Generate character in different scenes
- Editing software: Consistency cleanup
- Whisk again: Create merch versions (plushie, sticker)
The tool stack (what pros actually use):
- Whisk: Initial concepts and styled variations
- Midjourney or SD: High-quality finals
- Upscaler (Topaz, Magnific AI): Resolution boost
- Editor (Photoshop, Affinity): Refinement
- Mockup tools: Presentation
Pricing Reality Check
Whisk AI: Free (for now)
Midjourney: $10/month Basic, $30/month Standard, $60/month Pro
DALL-E 3: $20/month (via ChatGPT Plus)
Stable Diffusion: Free (self-hosted), or $10-30/month (cloud services)
Leonardo AI: Free tier exists, $12-48/month for paid
Value proposition: Whisk’s free access makes it incredible for experimentation. But if you’re making money from AI art, investing in paid tools makes sense for quality and flexibility.
The Honest Recommendation
Use Whisk if:
- You’re starting with AI image generation
- You want styled aesthetic outputs (plushie, sticker, etc.)
- You hate writing prompts
- You need quick concept iterations
- Budget is $0
Skip Whisk if:
- You need photorealistic, high-resolution outputs
- You require precise control over every detail
- You’re generating text-heavy designs
- You need unlimited daily generations
Use Whisk AND others if:
- You’re a professional creator (use the best tool for each task)
- You value speed + quality (Whisk for concepts, MJ for finals)
- You want to learn AI workflows holistically
14. Common Mistakes & Pro Tips
Let’s talk about the dumb stuff everyone does (including me) and how to avoid it.
Common Mistakes
Mistake #1: Using Low-Quality References
You upload a blurry, dark, pixelated image as your subject and wonder why the output looks… off.
The fix: Spend 2 extra minutes finding or creating a better reference. Quality in = quality out, always.
Mistake #2: Overcomplicating Scene Descriptions
“Sunset beach with purple sky and pink clouds and three seagulls flying left to right with a wooden boardwalk and…”
The fix: AI gets overwhelmed. Keep scenes focused. “Sunset beach, warm lighting, serene mood” works better.
Mistake #3: Fighting the AI
You want EXACTLY this pose, EXACTLY this expression, EXACTLY this lighting. You generate 40 times. All failures.
The fix: Accept that Whisk is a creative partner, not a photocopier. Give it direction, not orders.
Mistake #4: Ignoring Style Consistency
You generate 10 character images using different style prompts each time, then wonder why they don’t match.
The fix: Lock your style early. Reuse the exact same style reference or description for all generations in a project.
Mistake #5: Not Saving Intermediate Results
You generate something pretty good, think “I can do better,” regenerate, and lose the good one forever.
The fix: Download EVERYTHING. Storage is cheap. Lost generations are lost forever.
Mistake #6: Expecting Professional Results on First Try
You want a full sticker pack, polished and print-ready, in 10 minutes.
The fix: Professional results require iteration. Generate → evaluate → adjust → regenerate. Budget time accordingly.
Mistake #7: Not Testing on Actual Products
Your sticker design looks AMAZING on screen. You order 1,000. They arrive. The colors are wrong, details are lost, it looks cheap.
The fix: ALWAYS order samples before bulk ordering. Always.
Pro Tips from Actual Creators
Pro Tip #1: The Reference Library Method
Build a personal library of working references. When you generate something that works well as a style or scene reference, save it separately in a “References” folder.
Next time you need that aesthetic, you have a proven reference instead of starting from scratch.
Pro Tip #2: The Batch Variation Technique
Instead of changing everything between generations, change only ONE element:
- Generation 1: Subject A, Scene X, Style Z
- Generation 2: Subject A, Scene Y, Style Z (only scene changed)
- Generation 3: Subject A, Scene Z, Style Z (only scene changed again)
This teaches you exactly how each element affects output.
Pro Tip #3: The Upscale-Then-Refine Workflow
- Generate in Whisk (gets you 80% there)
- Upscale with AI (Topaz, Magnific, Real-ESRGAN)
- Clean up artifacts in Photoshop (gets you to 95%)
- Final polish (100%)
Don’t expect Whisk alone to deliver print-ready perfection. It’s one tool in a pipeline.
Pro Tip #4: The Style Mixing Formula
Combine aesthetic terms strategically:
“[Medium] + [Era] + [Mood]”
Examples:
- “Plushie toy + 90s aesthetic + nostalgic warm mood”
- “Sticker design + retro 80s + energetic vibrant”
- “3D render + modern minimalist + elegant clean”
This formula consistently produces more interesting results than single-word styles.
Pro Tip #5: The Morning Coffee Ritual
Some creators set aside 30 minutes each morning:
- 10 mins: Review previous day’s generations
- 15 mins: Generate new concepts (mind fresh, ideas flowing)
- 5 mins: Download and organize files
Result: Consistent daily progress without burning out your daily limit in one frantic session.
Pro Tip #6: The Client Approval Hack
If you’re creating for clients:
- Generate 6-9 variations in Whisk
- Create a simple 3×3 grid in Canva/Photoshop
- Present as “style directions” not “final options”
- Let client pick direction
- Refine chosen direction only
This saves you from generating 50 versions hoping one sticks.
Pro Tip #7: The Unexpected Reference
Don’t limit yourself to “logical” references. Sometimes:
- Using a texture photo as a style reference creates interesting effects
- Using an animal as a scene reference creates surreal compositions
- Using architecture as a style reference gives geometric characters
Experiment weirdly. Some of the best results come from unexpected combinations.
Advanced Creator Workflows
The Merch Seller Pipeline:
- Market research (what’s trending?)
- Whisk concept generation (20-30 ideas)
- Narrow to top 5
- Refine top 5 (multiple variations each)
- Mockup testing (Placeit, Printful)
- Order samples of best 2-3
- Photograph real samples
- Launch with real product photos
The Content Creator System:
- Whisk for thumbnail concepts (test 10+ options)
- A/B test thumbnails on social media posts
- Use winning style for video thumbnail
- Use same style for channel branding
- Create animated version (Veo) for short-form content
The Character Design Process:
- Sketch rough concept (traditional or digital)
- Use sketch as Whisk subject
- Generate 10+ style variations
- Client review (pick top 3)
- Refine top 3 (adjust scene/style)
- Final selection
- Create expression sheet (happy, sad, angry, surprised)
- Create pose sheet (standing, sitting, action)
- Deliver full character package
Mindset Shifts That Help
Shift 1: From “This should work” to “Let’s see what happens”
AI is probabilistic. Embrace experimentation over expectation.
Shift 2: From “I need perfection” to “I need good enough to enhance”
Whisk gets you 80% there. Traditional skills get you the final 20%.
Shift 3: From “Why doesn’t this work?” to “What is this teaching me?”
Every “failed” generation teaches you something about how Whisk interprets your inputs.
Shift 4: From “I need to master everything” to “I need to know enough”
You don’t need to be a Whisk expert. You need to be good enough to serve your specific goals.
15. FAQs & Troubleshooting
Let’s tackle the questions everyone asks and the problems everyone hits.
FAQ #1: Why does my output look different every time?
Answer: This is how generative AI works. Whisk uses your references as inspiration, not templates. Each generation involves random elements in the AI’s decision-making process. Think of it like asking five artists to paint the same subject—you’ll get five unique paintings.
What you can do: Use your best generation as a reference for future attempts. This locks in more consistency.
FAQ #2: Why do faces or hands look weird?
Answer: Hands and faces are notoriously hard for AI. These body parts have complex structures and the AI sometimes “hallucinates” extra fingers, weird proportions, or uncanny expressions.
What you can do:
- Generate multiple versions (law of averages—some will be better)
- Use simpler styles (plushie, cartoon) where anatomical perfection matters less
- Edit problematic areas in Photoshop afterwards
- For hands: Hide them (behind back, in pockets, out of frame)
FAQ #3: Why does style override my realistic photo?
Answer: This is intentional. When you apply a style (like “plushie” or “anime”), Whisk interprets your subject through that aesthetic lens. It’s not a filter—it’s a transformation.
What you can do: If you want realistic outputs, use style references that are realistic (professional photographs, photorealistic art). Avoid stylization keywords like “cartoon,” “animated,” “toy,” etc.
FAQ #4: Can I use Whisk commercially?
Answer: Yes, with caveats. Google’s terms allow commercial use of generations, BUT:
- Don’t use recognizable people’s likenesses without permission
- Be transparent that your art is AI-generated (some platforms require this)
- Check local laws about AI art commerce
- POD platforms have their own policies—read them
FAQ #5: Is there a premium/paid version?
Answer: Not yet (as of early 2026). Whisk is experimental and free. Google may introduce paid tiers later, likely with higher daily limits, better resolution, and priority processing.
FAQ #6: Can I generate NSFW content?
Answer: No. Whisk has content filters that block sexual, violent, or otherwise inappropriate content. These filters are aggressive—even innocent requests sometimes get flagged by mistake.
If you’re falsely flagged: Rephrase your prompt, use different reference images, or try again later (sometimes it’s just glitchy).
FAQ #7: Why does my subject look completely different from my reference?
Answer: Usually one of these reasons:
- Your reference image is unclear or low quality
- You’re using a very strong style that transforms everything
- The AI is misidentifying your subject (happens with complex images)
Fix: Use clearer, simpler reference images. Crop your subject so it’s clearly the focus.
FAQ #8: Can I generate specific text or logos?
Answer: Whisk is not great with text. It might include text-like elements, but it won’t accurately reproduce specific words or logos. For text-heavy designs, use DALL-E 3 or design software instead.
FAQ #9: How do I share my Whisk creations on social media?
Answer: Just download and post like any image. But consider:
- Be transparent that it’s AI-generated (good practice, sometimes required)
- Credit Whisk/Google Labs if you want
- Tag appropriately (#AIart #WhiskAI)
- Follow platform-specific AI content policies
FAQ #10: Why did Whisk reject my image upload?
Answer: Possible reasons:
- Image file is corrupted
- File size too large (try under 5MB)
- Format not supported (use JPG or PNG)
- Content violation (face of minor, copyrighted character, etc.)
- Server glitch (try again)
FAQ #11: Can I save my projects or history?
Answer: Currently, no. Whisk doesn’t have a project management system. Once you close the browser or refresh, your generations are gone unless you downloaded them.
Workaround: Download everything immediately. Use your own organization system (folders, cloud storage).
FAQ #12: When will Whisk become a full product?
Answer: Unknown. Google Labs experiments sometimes graduate to full products (like Bard → Gemini), sometimes get shuttered (RIP to many), and sometimes stay experimental indefinitely.
What to do: Use it while it’s free and good. Don’t build your entire business on it until it’s a stable product.
Troubleshooting Guide
Problem: “Something went wrong” error
Causes: Server overload, network issue, bad request
Fixes:
- Refresh page
- Check internet connection
- Try different browser
- Wait 10 minutes and retry
- Clear browser cache
Problem: Generations are slow
Causes: Peak usage times, server load
Fixes:
- Generate during off-peak hours (early morning, late night)
- Be patient—complex generations take longer
- Check your internet speed
Problem: Can’t download images
Causes: Browser settings, popup blockers
Fixes:
- Allow popups from labs.google.com
- Try right-click → Save Image As
- Screenshot as last resort
- Try different browser
Problem: My style isn’t being applied
Causes: Weak style description, conflicting references
Fixes:
- Be more specific in style description
- Use a style reference image instead of text
- Check that scene isn’t overriding style
- Try more extreme style keywords (“very [style]”)
Problem: Results are consistently bad
Causes: Poor references, vague prompts, unrealistic expectations
Fixes:
- Review the tutorial sections on references and prompts
- Start simple and build complexity gradually
- Compare your approach to example workflows
- Accept AI limitations (it’s not magic)
Problem: Daily limit seems wrong
Causes: Shared network, account-specific limits, time zone confusion
Fixes:
- Verify your time zone vs Pacific Time
- Try different network (home vs mobile data)
- Check if others on your network are using Whisk
- Contact Google Labs feedback (though response unlikely)
16. Conclusion & Next Steps
Congratulations—you’ve made it through the complete Whisk AI tutorial. You now know more about Whisk than 95% of users.
Who Should Keep Using Whisk AI Long-Term?
Perfect for:
Content creators who need consistent character designs across thumbnails, videos, and social posts. Whisk’s visual reference system makes maintaining brand identity easier than text-based tools.
Merch sellers who want to rapidly prototype plushie, sticker, and product designs. The speed from concept to printable design is unmatched.
Beginners who feel intimidated by complex AI tools. If Midjourney’s Discord interface or Stable Diffusion’s technical requirements scare you, Whisk is your friend.
Rapid prototypers who value speed over perfection. Need 20 concepts by EOD? Whisk delivers.
Maybe not for:
Professional photographers needing photorealistic, high-resolution outputs. Midjourney or Stable Diffusion better serves your needs.
Designers requiring pixel-perfect precision. If your work demands exact specifications, traditional tools or more controllable AI systems are better.
High-volume producers who’ll hit daily limits in an hour. You’ll need paid alternatives with higher (or unlimited) quotas.
Best Use Cases Going Forward
Where Whisk truly shines:
1. Character Concept Development
Design characters visually, iterate quickly, establish consistent visual identity.
2. Merch Design Pipeline
From concept to print-ready in hours, not days. Plushies, stickers, apparel graphics.
3. Social Media Content Creation
Consistent thumbnails, profile graphics, story content with your brand aesthetic.
4. Style Exploration
Test different artistic directions before committing to final production.
5. Reference Generation for Traditional Artists
Create visual inspiration boards, pose references, lighting studies.
6. Animation Style Frames
Generate key frames for animation projects, then animate with Veo or other tools.
Tools to Pair with Whisk AI
Editing & Enhancement:
- Photoshop/GIMP: Cleanup, refinement, compositing
- Topaz Gigapixel/Magnific AI: Upscaling for print quality
- Canva: Quick mockups and social media formatting
Animation:
- Veo 2: Image-to-video from your Whisk creations
- Runway ML: Additional video effects and editing
- CapCut: Free video editing for social content
Merch & Mockups:
- Printful/Printify: Print-on-demand services
- Placeit/Smartmockups: Product mockup generators
- Remove.bg: Background removal for stickers
Alternative AI Tools:
- Midjourney: Higher quality finals
- DALL-E 3: Better text integration
- Stable Diffusion: Ultimate control (with learning curve)
The complete stack:
Whisk (concept) → Topaz (upscale) → Photoshop (refine) → Veo (animate) → Mockup tool (present) → POD service (sell)
Final Tips for Mastering Whisk AI Faster
1. Document your wins
Keep a “what worked” file. Screenshot successful generations with notes on what references and prompts you used.
2. Create a reference library
Build a personal collection of working subject, scene, and style references. This becomes your creative arsenal.
3. Daily practice beats binge sessions
15 minutes daily teaches you more than 3-hour weekend marathons. Consistency builds intuition.
4. Join the community
Find Whisk AI communities (Reddit, Discord, Twitter). See what others create, steal ideas, share your work.
5. Combine with traditional skills
The best AI artists are also skilled in traditional tools. Whisk gets you 80% there; your skills finish the job.
6. Stay updated
Google Labs experiments evolve rapidly. Features change, limits adjust, new capabilities emerge. Follow updates.
7. Think in workflows, not individual images
Don’t optimize single generations. Optimize your entire creative process from concept to final delivery.
8. Embrace the weird
Sometimes Whisk’s “mistakes” are more interesting than your planned result. Don’t delete everything that’s not perfect.
Your Next Steps
This week:
- Generate 10 different style variations of the same subject
- Create a character and try making it consistent across 5 different scenes
- Design one print-ready sticker or plushie concept
This month:
- Build your reference library (20+ saved references that work)
- Complete a small project start-to-finish (sticker pack, thumbnail series, character design)
- Test one mockup and order one sample product
This year:
- Launch a product line or content series using Whisk
- Combine Whisk with 2-3 other tools into a polished workflow
- Teach someone else what you’ve learned (teaching solidifies your knowledge)
The Mindset That Wins
Remember: Whisk AI is a tool, not a replacement for creativity. The best creators use AI to amplify their vision, not to replace having one.
Your taste, your ideas, your creative direction—that’s what makes the difference between generic AI art and something people actually want to see (or buy).
Don’t wait for Whisk to become “perfect.” It won’t. Use it now, while it’s free, messy, experimental, and full of possibility.
The future of creative work is humans + AI. You’re already ahead by learning this skill set in 2026.
Now stop reading and go create something awesome.
Have questions or want to share your Whisk creations? Drop them in the comments below. Let’s build this community together.
Found this guide helpful? Bookmark it. You’ll want to reference it again as you work on projects.
Want more AI creativity tutorials? Subscribe for guides on Veo, Midjourney, Stable Diffusion, and the entire AI creator toolkit.
Happy creating!